A payment processor is the gateway that takes your customers’ payments — for example Stripe, PayPal, or Braintree. This guide shows how to add and set one up.
1. Open the Add Processor panel
On the Processors tab, click Add Processor. A panel opens listing every payment gateway commercebuild supports.
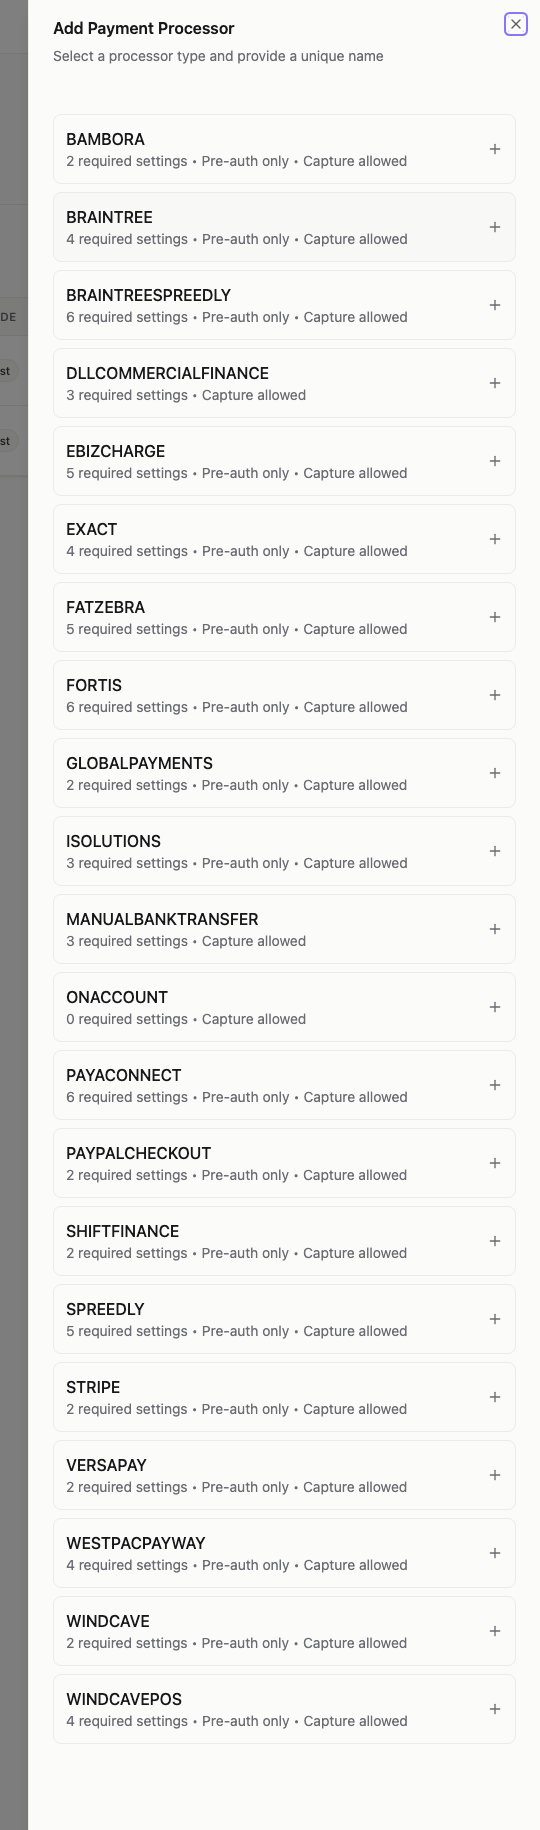
Each gateway shows two helpful details:
- Required settings — how many pieces of information (such as account keys) you’ll need to enter to connect it.
- Capture behaviour — whether it can only pre-authorise a payment, or can capture (take) the funds. See the note on capture below.
Find the gateway you use and click the + next to it.
2. Name it and add its details
Give the processor a Processor Name — a unique label so you can recognise it in the list. Underneath, you’ll see the Required Settings for that gateway.
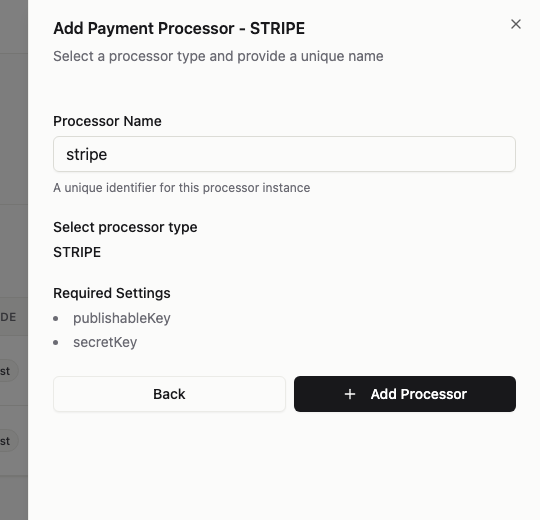
The required settings are the credentials your payment provider gives you from their own dashboard. For Stripe, for example, these are a publishable key and a secret key. Copy them across exactly, keep them private, then click Add Processor to save. Use Back if you picked the wrong gateway.
Test mode vs Live mode
A processor can run in Test mode — ideal while you’re setting things up, as no real money moves — or Live mode, which takes real payments from customers. Start in Test mode, confirm everything works, then switch to Live when you’re ready.
Capture: take payment now or later
Some businesses take payment the moment an order is placed; others prefer to authorise the card first and capture the funds when the order actually ships. The Capture setting controls this. Not every gateway supports both — the gateway list tells you whether a processor is pre-auth only or allows capture.
Editing or removing a processor
Back on the Processors list, use the pencil icon to change a processor’s details and the bin icon to remove one you no longer need.