Payment mappings connect a payment method in your store to the matching payment details in your accounting system, so that when an order comes through it’s recorded against the right account. You’ll find them on the Payment Mappings tab of the Payment settings page.
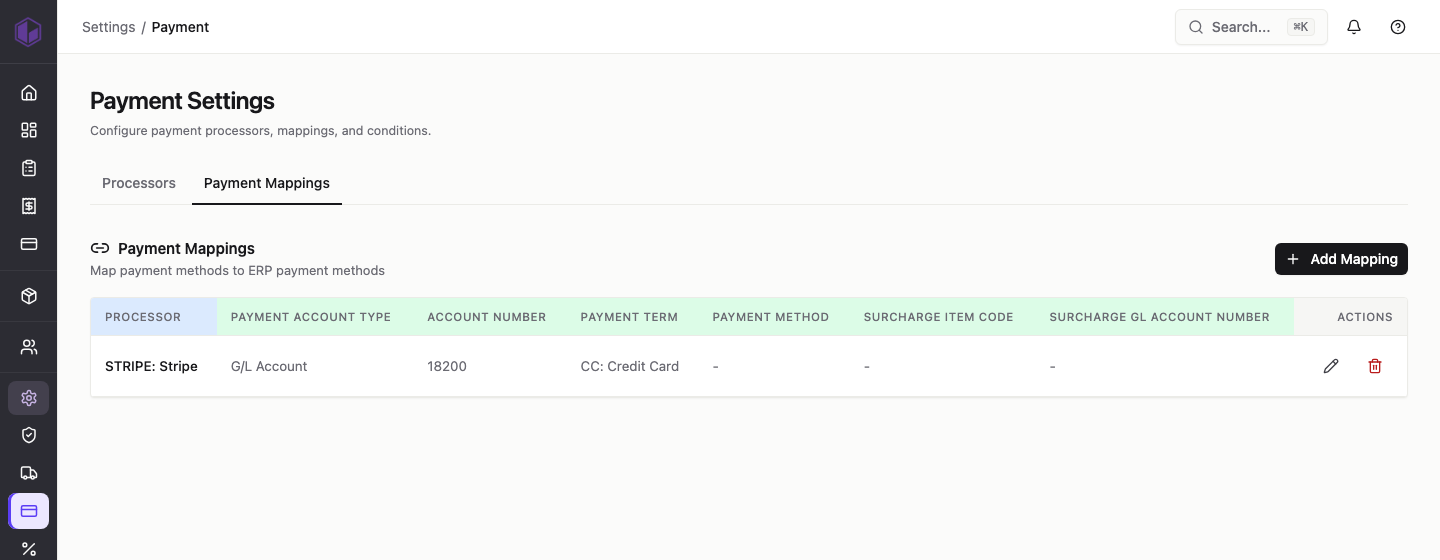
Reading the mappings list
Each row shows a processor on the left and the accounting details it maps to across the columns — the account type, account number, payment term, payment method, and any surcharge details. A dash (–) simply means that detail isn’t set for that mapping.
Adding a mapping
Click Add Mapping to open the panel. It’s split into two parts.
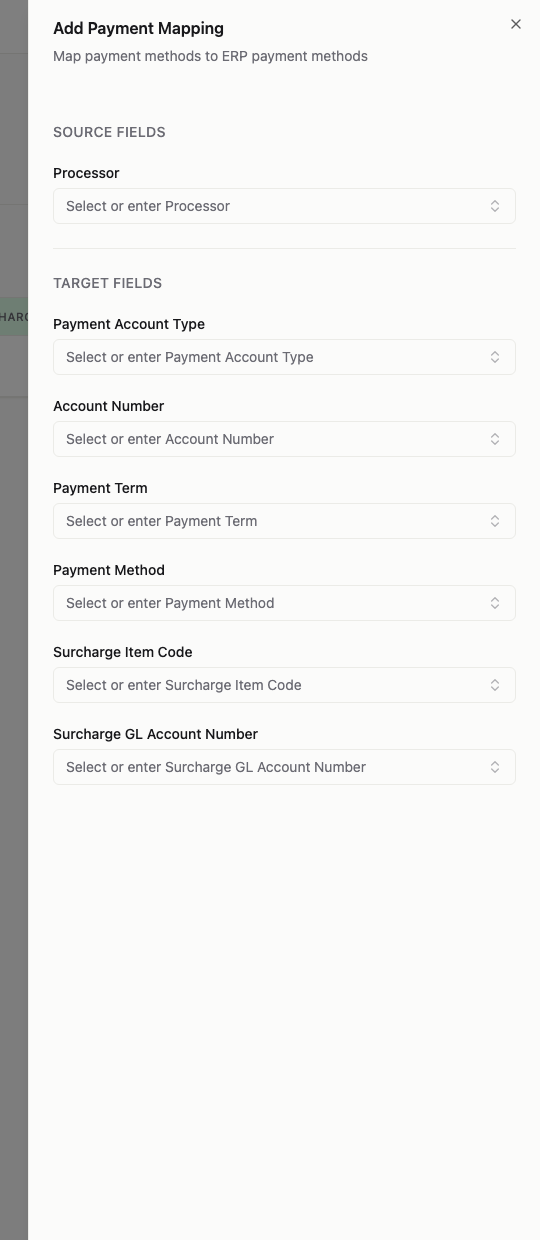
- Source fields — the Processor this mapping applies to. Choose one you’ve already set up.
- Target fields — the matching details in your accounting system:
- Payment Account Type — for example, a G/L account.
- Account Number — the account the payment should post to.
- Payment Term — the payment term to apply.
- Payment Method — the matching method in your accounting system (for example, Credit Card).
- Surcharge Item Code and Surcharge GL Account Number — used only if you apply a surcharge; leave blank if you don’t.
Each field lets you pick from a list or type a value. When you’re done, click Add Mapping to save, or Cancel to close without saving.
Editing or removing a mapping
Use the pencil icon on a row to adjust a mapping, or the bin icon to remove it.
If you’re not sure which account numbers or payment terms to use, check with whoever manages your accounting system so orders post to the right place.